반응형
저번에는 Image를 넣고 가로넓이, 새로 넓이 조절하는 법과 BoxFit을 사용하는 법을 배웠다
https://initstory.tistory.com/114
이번에는 가로넓이, 새로넓이를 조절하지 않고 화면비율대로 조절하는 법을 하겠다
이때는 AspectRatio 라는 위젯을 사용한다
1. 기본코드
main.dart
import 'package:flutter/material.dart';
import 'package:flutter_practice/pages/practice_page.dart';

void main() {
  runApp(const MyApp());
}

class MyApp extends StatelessWidget {
  const MyApp({Key? key}) : super(key: key);

  // This widget is the root of your application.
  @override
  Widget build(BuildContext context) {
    return MaterialApp(
      home: const PracticePage(),
    );
  }
}
practice_page.dart
import 'package:flutter/material.dart';

class PracticePage extends StatelessWidget {
  const PracticePage({Key? key}) : super(key: key);

  @override
  Widget build(BuildContext context) {
    return Scaffold(
      appBar: AppBar(
        backgroundColor: Colors.black,
        leading: Icon(Icons.car_crash),
        title: Text("Appbar"),
        actions: [
          Icon(Icons.search),
        ],
      ),
      body: Container(
        decoration: BoxDecoration(
          color: Colors.red,
        ),
        child: Column(
          children: [
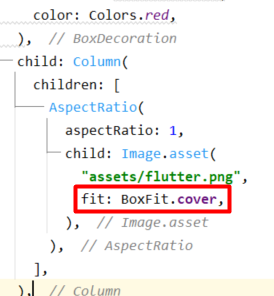
            Image.asset(
              "assets/flutter.png",
              fit: BoxFit.cover,
            ),
          ],
        ),
      ),
    );
  }
}이대로 실행 하면 아래와 같이 나온다

Container에 컬러를 넣어주고 좀 더 보기 쉽게 해 놨다
2. AspectRatio 적용

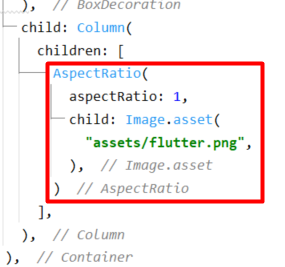
AspectRatio(
  aspectRatio: 1,
  child: Image.asset(
    "assets/flutter.png",
  ),
)코드를 위와 같이 수정했다
그랬더니 아래와 같이 되었다


이 부분이 화면의 비율대로 설정하는 것이다
BoxFit.cover를 넣고 다시 보도록 해보자


aspectRatio의 값을 바꿔 보도록 해보자

aspectRatio: 2 / 1로 변경했다
만약 화면이 가로 300이고 새로 600이면
새로 높이 = 가로(300) / 2 * 1
가 될 것이다.
그러면 가로 300에 높이 150이 된다.
2 / 1의 결과를 보도록 하자

이렇게 화면의 비율에 맞춰서 이미지의 크기를 설정하는 법을 배웠다
반응형
'Web Programming > Flutter&Dart' 카테고리의 다른 글
| Flutter Button 형식 만들기 (0) | 2023.02.16 |
|---|---|
| Flutter 모서리 둥글게 하기 (feat.ClipRRect, feat. CircleAvatar) (2) | 2023.02.15 |
| Flutter Image 넣기 (0) | 2023.02.13 |
| Flutter 정렬 (CrossAxisAlignment, MainAxisAlignment) (0) | 2023.02.10 |
| Flutter의 Padding EdgeInsets (all, only, symmetric차이점) (0) | 2023.02.09 |
